
Operating a Contest
Before the Contest
This section addresses, in a brief and informal way, steps that you should take to get ready for a contest season and for each contest. It is worth reading. Where appropriate, links are included to point you to more extensive information.
Update Your Data Files
Make sure you have imported the latest wl_cty.dat file and downloaded the latest Super Check Partial (master.scp) file prior to the contest. Menu options for doing this may be found on the Tools menu of the Entry window.
If you are using a Call History file, import that into the database also and make sure Call History Lookup is on. More information about Call History can be found in this section.Load the function key definition file that you plan to use into the database too. If you make any changes during testing, export your function keys to make sure your changes are saved. An explanation of how to create function key definitions is found HERE, with additional information specific to phone function key messages HERE. Sample Function Key files for the major contests can be found in the >Downloads >Function Key Files folders for CW, SSB, and Digital modes . Click here to watch videos about downloading and configuring your data files.
If you’re going to be operating in a remote location without Internet access, go to the >Downloads >Documentation Downloads (PDF) folder for a PDF version of the manual. Store a local copy of the documentation in case you need to reference it when disconnected from the website.
Test
Today, the program supports CW, SSB and multiple digital modes, close to 300 contests, and a wide variety of radios and ancillary equipment. Contest rules change all the time, and organizers often forget to let logging software developers know. If this were a conventional software project, any sane programmer would declare it “untestable.”
Since its early days, the N1MM Logger project has relied on users to do most of the testing. Rapidly releasing relatively small updates, with the option of retreating a version or two if necessary, makes this a relatively low-risk approach, so long as users test each one enough in advance of the next contest they want to get into.
If you are planning to operate in a contest a couple weeks from now, load the latest update NOW, create a contest “instance” as outlined here, sit down with your radio, computer, DX cluster connection, keyers, and whatever else you use, and simulate logging a dozen contacts as if you were running (enter a make-believe call, type and hit function keys as fast as you can). Then log a few more in S&P mode. Make sure your messages and macros work as expected, make sure you can record and playback SSB messages on the fly, make sure the multipliers you think should be counted are scored right, log some contacts that shouldn’t be multipliers or points and make sure they are handled properly. If operating Assisted, grab some spots, make some spots, check the color-coding of spots against the contest rules. Make detailed notes of problems, if any.
A lot of problems are the result of a local issue – hardware settings, user options or the like. Do take the time to check the documentation first, but then don’t hesitate to ask for help on the N1MM reflector. 4000 users and the N1MM team are there to help. With thanks to David Robbins K1TTT, from whose input this section was adopted.
During the Contest
Making Contest QSOs
Make sure you have your CW or SSB or digital function key definitions set up the way you want, set up as outlined in Before the Contest.
Now let’s begin. There are several ways to make and log a contest QSO with N1MM Logger+, depending on how much you want to automate the process. The details are the same for either phone or CW. The 4 main ways you can use the stored messages are listed here in ascending order of speed and convenience.
1. One key at a time – press a function key when you want to send the associated message. Use the [Space] bar to move your cursor. When you have everything filled in, press [Enter], and the QSO will be logged. Done this way, a typical Run (CQ) QSO would look like this:
- F1 (CQ)
- Station answers – copy call in callsign box
- Say his callsign (phone) or press F5 to send it (CW)
- Press F2 to send the exchange (either a stored voice message or CW)
- Press [Space] to move the cursor to the exchange field
- Type in the received exchange
- Press F3 to send your acknowledgment
- Press [Enter] to log the QSO
2. Semi-CT Style – CT was the DOS logging program that pretty much started all this. It used the following convention to save keystrokes:
Enter the callsign of the station calling you. Press the [Ins] key to send his call and your exchange (CW), or speak his call and then press [Ins]. Once you have copied his exchange, press F3 (TU) and [Enter] to Log. If you are calling other stations (Search and Pounce, or S&P), you would first press F4 to send your call, and when the station responds follow the sequence as above.
3. Early N1MM style – Enter the callsign of the station calling you. Press the [;] key to send his call and your exchange. Copy his exchange and press the “[‘] (right next to ; on US keyboards). The program sends the F3 (TU) message and logs the QSO. In S&P, you would hit F4 first, then [;] and then [‘].
This saves some keystrokes, but there’s an easier way. A couple of decades ago, N6TR developed the idea of making TR Log “modal.” By that, he meant that the program would behave differently depending on whether you were in Run or S&P mode. Making this distinction let him massively simplify and shorten the sequence of keystrokes required to complete a QSO.
4. Enter Sends Messages – N1MM Logger has now evolved N6TR’s invention into what is called Enter Sends Messages, or ESM for short. You’ll find a full explanation of this mode in this section.
In short, ESM enables you to enter a callsign and then step through the remaining steps in logging a QSO, simply by hitting the Enter key. The program anticipates what you’ll want to do next, moves the cursor, and highlights what canned message will be sent if you press Enter the next time. Note that if you wish, you can still press individual function keys at any time, to send a repeat or otherwise bypass ESM.
Once you’ve used ESM, we think you’ll never go back to the old way again.
Bugs Encountered During a Contest
When a bug was missed during testing and comes out during the contest please report it on the reflector right after the contest or, during the contest if it is a show stopper. Tom and the developers participate in many contests but they also read the mail during contests and can suggest work-arounds or sometimes bring out a new version. In addition, there are many other hams available there who can help.
Rather than writing down problems during the contest, try the following:
- Use Ctrl+N to write a Note that will be attached as a comment to the QSO
- At the end of the contest, use the menu option >View >Notes to see all the notes you have made during the contest
After the Contest
First, a Word on Protecting Your Data
After almost every contest, we hear from a new user (or sometimes even an experienced one) who is afraid he or she has lost the log from the contest just completed. Fortunately, it is usually not true, but here are a few things to remember:
- Backup – this is just as important with logging software as with any other computer application. Data not backed up can be data lost if something happens to your hardware or you make a mistake while manipulating the log database if you haven’t backed it up. N1MM Logger+ stores all your QSO data in a file with the extension .s3db. The name of the file is whatever name you assigned to it when you first set up the program. There are other databases also used by the program – N1MM Admin.s3db, N1MM Packet Spots.s3db, and Do_Not_Use_Or_Erase.s3db, but all the QSO data are in that first one. The easiest way to do really secure backup is to use a free backup program such as Syncback SE to back up your active QSO database to a USB “thumb drive.” Any such drive you can buy today is plenty big enough, dirt cheap, and safe from virtually anything short of a ball peen hammer.
- Save A Copy – Before you do anything, even if you just want to peek into your QSO database with an SQLite viewer, save a copy manually to a safe location. You are, after all, only human; we all can make mistakes, so it’s wise to do what you can to protect yourself against them.
- Transaction TRN Files – During normal operation N1MM Logger+ saves the information about each QSO in a simple text file. These files are stored in a sub-folder in the Databases folder in the user files area and can be used to recover in the event the database file is corrupted.
- Here’s an explanation of how you can use those files to recover your data quickly, during a contest, or at your leisure if you haven’t done one of the two steps suggested above:
- The transaction log is created for each contest you log to
- The file is closed after each transaction and reopened to force the data to be written to disk
- To keep things simple and foolproof, you are not allowed to change the name of the transaction log
- The name is used to make sure you are loading it properly, and to prevent mixing logs of two contests. Example name: ‘CQWWCW – 2005-09-19 – 14.TRN’ i.e.: Contest name – date log created – an internal index number
- To Recover your log, you MUST import the transaction log into a NEW (empty) database and a NEW contest log. See THIS LINK
- The new contest log must be the same contest as the contest from the transaction file (Example: if restoring CQWPXCW, the new contest must also be CQWPXCW). Why? To prevent a user recovering from a database problem making the problem worse. This will prevent any issues from duplicate contacts and a number of other problems
- As you load the transaction log, a new transaction log is automatically made with the transactions in the first log. Thus you should never have to merge logs. You always use the last one
Editing Individual QSOs
The easiest way to edit a QSO is by double-clicking in the Log window on the data you want to change. In rare cases, you may need to select the QSO in the Log Window and right-click. Select “Edit Contact.” The Edit Contact Window will appear – for full details see the explanation here.
Contest sponsors are cracking down on post-contest log “massaging” that uses resources you access after the contest is over. The CQWW Contest Committee has recently been particularly explicit about this, saying that “the…Committee considers it unsportsmanlike to ‘clean’ your log post-contest using data sources such as recordings, call sign databases, etc.” This kind of restriction is not intended to apply to post-contest log changes that are based on things you noted during the contest, such as problems with the CTY.DAT file, bad abbreviations for counties, states or provinces, etc. If you caught it during the contest, you should feel free to fix it afterward.
Sometimes you may need to recover a QSO that you deleted by mistake during the contest. When a QSO is deleted, it is not completely removed from the database; instead, it is moved into a special log called DELETEDQS, from which it can be recovered as follows:
- First, export the contest log to ADIF (File > Export > Export ADIF to file > Export ADIF to file…). Open that ADIF file with Notepad and look for an entry that looks like <CONTEST_ID:nn>contest-name in each QSO record. Take a note of what nn and contest-name are – you will need to use them in the next step (nn is a count of the number of characters in contest-name). Keep that Notepad window open.
- Open the DELETEDQS log from inside N1MM+ (File > Open Log in Database… – it will be the bottom log entry on the list), find the QSO in question, right-click on it and select Copy > Copy ADIF string (Copy is near the bottom of the popup menu). Then you can paste that into the Notepad window with the main contest log ADIF file in it. Edit the <CONTEST_ID:8>DELETEDQS field in the recovered QSO record to change it to match the other QSOs in the file. Save the file.
- In N1MM+, create a new database (File > New Database…). In that new database, create a new contest log of the correct type. The start date and time won’t be right, but you can edit those to change them to the actual contest date. Now import the edited ADIF file into the log (File > Import > Import ADIF from File…), and use the Tools > Rescore Current Contest menu item to recalculate the score.
Entering Multiple QSOs After the Contest
Computer trouble? Made a paper log during (part of) the contest? The program has some nice features that will allow rapid QSO entry. You can either enter the time for each QSO, or there are features to let you set the date and time via interpolation. (Remember, exact QSO times are not critical for contest sponsors, just within reason).
- Type frequency band (4 or 5 digit numeric frequency, e.g. 7000, 14000) in the call-sign textbox of the Entry window and hit Enter. Then type the mode (CW, USB, LSB, etc.) and hit Enter.
- Enter calls and exchanges, and log them, as long as they are on the same band. Don’t worry about date and time right now.
- When you need to change bands, enter the new frequency band and continue.
Change Time/Date for a Single Hand-Entered QSO
Updating the date and/or time of a single QSO is best done by double-clicking on the time stamp for that QSO and then using the date-time box that appears to edit the date and time. Alternatively, you can use the Edit Contact option in the right-click menu associated with the Log Window and edit the date and/or time in the Edit Contact window.
Change Time for Multiple Hand-Entered QSOs
This method can be used to interpolate approximate times for a series of contacts. This time interpolation feature is most useful if you have a bunch of QSOs to enter. If you have one or two QSOs whose times need changing it is easier to do it by editing in the Log
Make a backup copy of your log database. You cannot (automatically) reverse the time interpolation process below. You have been warned!
- In the Log window, single-click the first QSO whose time and date you want to change. to highlight the row
- With mouse over the Log window, right click
- Select >Set Start Interpolation Time Row
- Enter the new timestamp for the first QSO, and click [OK]
- Now, click on the last QSO whose time/date you want to change, to highlight the row
- With mouse over Log window, right click
- Select >Set Stop Interpolation Time Row
- Enter desired time for that last QSO, and click [OK]
The utility will average out and interpolate the time for each QSO in the group of QSOs you have selected. Remember there is no “undo” feature. If you have a large gap in time in your hand log, enter the first batch of QSOs, and do the interpolation. Then enter the second group of QSOs and do a 2nd interpolation.
If you have more than one computer networked in N1MM+, this feature does not work. The option is disabled whenever Networked Computer Mode is on.
Change All QSO Times/Dates by a Fixed Amount
While you could easily recover from a mistake during the following adjustment by performing another offset, it is still a good idea to play safe.
This will fix a log where all QSOs are off by a fixed amount of time (for example, when the times are correct but the dates are wrong by one or more days because the QSOs were entered after the contest).
- Right click in the Log window
- Select >Change timestamps of the entire log by a fixed amount
- A dialog box will open, and enter offset time (+ or -) in minutes
The date will automatically adjust if the offset rolls a QSO into a different day. Time is entered in minutes, and can be negative time to go backwards. (You might need a calculator to determine the offset minutes if your date was off by many days, months, or years). For example, entering +1440 will shift a complete day forward; -2880 two days back.
How to Create Cabrillo Files
To submit your log, you need to export it from the database in the proper format. Cabrillo is used by all major contests.
- Select File >Generate Cabrillo File.
- Make sure that your Station information (Config >Change Your Station Data), and overall contest setup are correct (in the Contest Setup dialog, reached through File >Open Log in Database …). For example, is your entry class correct? Your power classification? Whether Assisted or not? Are your State and ARRL Section both entered correctly in your station data?
- Did you put the right information in the Sent Exchange field, and nothing else? For example, when the exchange in a contest is 5NN WV, it may be tempting to put the whole thing in the Sent Exchange. That will screw up the Cabrillo file with multiple signal reports for each QSO, so get in the habit of putting the signal report in your stored messages, not in this field.
- A Cabrillo file will be created named your_call.LOG. By default this is placed in the ExportFiles sub-folder in the N1MM Logger+ user files directory, but you are given the options of choosing a different name and/or of saving the file anywhere else you wish.
It is a good idea to rescore your log (Tools >Rescore Current Contest) before generating the Cabrillo file.
How to Merge Contest Logs
If you ran a multi-op station but did not network your logging computers, you will need to combine the logs from each computer into a single log submission for the contest sponsors.
Using N1MM Logger+ and ADIF Files to Merge Logs
This merge method is the most automated and should require no manual log editing, but will only succeed if the contest types in each logging computer were identical. If the contest types were not identical, it may be possible to recover with the help of a text editor and some detective work, but it will likely not be easy. It’s better by far to avoid this situation by using the identical contest types during the contest.
- Examine the logs to ensure that the contest types are identical in each computer: >File >Open Log in Database
- Export an ADIF file from each logging computer: >File >Export >Export ADIF to file. Assign a unique name to each ADIF file to distinguish it from others when importing. Before continuing, guarantee that the contest types from each computer were identical by opening each ADIF file with a text editor (like Notepad) and looking for the ADIF expression CONTEST_ID. They should all be the same length and contest name. For example: <CONTEST_ID:14>ARRL-FIELD-DAY
- Copy all exported ADIF files to the computer that will create the merged log
- Launch N1MM Logger+ in the merge computer. If the merge computer is one of the ones that was used during the contest, you will need to create a new database for the merged log: >File >New Database. Now in the new database or on the new computer, create a new contest log for the merged records: >File >New Log in Database. Be careful to make the contest type identical to the contest type that was used during the contest
- Import the extracted ADIF files one after another into the new contest log: >File >Import >Import ADIF from file
- Use >Tools >Rescore Current Contest to rescore the contest
- Extract the new, merged contest log for submission to the contest sponsor: >File >Generate Cabrillo File
Using Excel and Cabrillo Files to Merge Logs
In some circumstances, it might be easier to combine logs outside N1MM Logger+ by importing the Cabrillo files into a spreadsheet program like Excel. As with the ADIF method, this works best if the contest types are identical, or at least use the same Cabrillo format (i.e. similar contest exchanges, same columns).
- Create a Cabrillo file from each log: >File >Generate Cabrillo file. Assign a unique name to each log file to distinguish it from others when importing
- Copy all exported Cabrillo log files to the computer that will create the merged log
- Combine the QSO records from each Cabrillo log into a single text file using a text editor (like Notepad). Open each Cabrillo file, and copy only the QSO records – leave out the header information in the beginning and END-OF-LOG statement at the end. Paste this QSO information into a new text document (a .TXT file) with the QSOs from every log.
- Launch Excel in the merge computer, and import the combined .TXT file into a spreadsheet. In Excel: >File >Open, set file type for TXT, and select the merged QSO log file. In the Excel text import wizard, declare the original data type as fixed width. In the Data Preview dialog window, adjust the field delimiters as necessary to begin each Excel column at the beginning of a log field. Press [Finish]. Examine the QSO columns in the spreadsheet to ensure that your import was successful
- Select the entire spreadsheet using your mouse or [Ctrl]A, then sort the spreadsheet by date and time: >Data >Sort, column D (date), and column E (time)
- Export the sorted log data to a space-delimited file: >File >Save as >FORMATTED TEXT (Space Delimited) .PRN
- Using an editor, copy/paste the Cabrillo header information and END-OF-LOG statement from one of the original Cabrillo logs into the sorted data file. Rename this file as a .LOG file type and submit it to the contest sponsor.
How to Print the Log
There is no specific option for printing a log directly. However, if you Click on Export on the File menu, there’s a variety of options that can be used to create a file that you can then print a copy of:
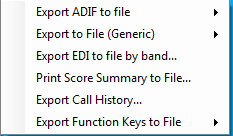
The most likely reason for wanting a printed log is for awards submissions or archiving. Because N1MM Logger+ is not intended as a general-purpose logging program, it does not offer award tracking functions. However the ADIF file option will give you a file that can be readily imported into any popular general logger. If you just want something for a notebook, the Generic export will give you a text file that can be printed from Notepad.
How to Get Statistics
From the View menu item in the Entry window, choose Statistics. This tool allows you to select any two data points of interest. For example, you can select hours for the Row and Zones for the Column, and the program will display a table of how many QSOs in which zones were worked in which clock hours. This is a lot easier to use than it is to explain in words, so give it a try.
