Skins, Colors and Fonts
The configuration settings for N1MM Logger Plus allow customization of most of the fonts and colors used in the program. To access the Manage Skins, colors and Fonts dialog window, select Manage Skins, Colors and Fonts on the Entry window’s Config menu.
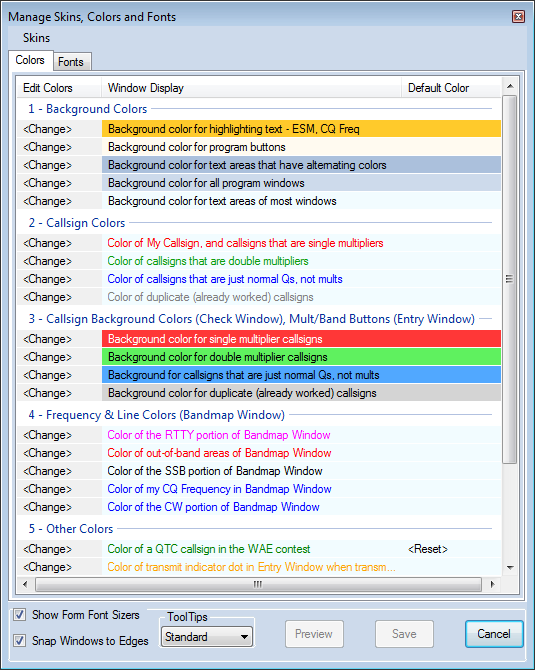
Colors Tab
The Colors tab displays the current setting for 24 program colors. Clicking the [Change] button in the left column allows you to select a different color. If you select a color different than the default skin color (read about the default color below), a [Reset] button will appear in the right hand. Clicking [Reset] will revert that color to the program’s default value, regardless of the skin you are currently using.
Color settings can be grouped in three categories: Global, Shared, and Dedicated.
- Global color settings affect every window in the program. Examples of Global colors are:
- Background color for all program windows
- Background color for program buttons
- Background color for text areas of most windows
- Shared color settings affect several windows in the program. Examples of Shared colors are:
- Callsign colors (dupes, normal Qs, mults, double mults): Affect the colors of callsigns in the Bandmap, the Digital Interface Receive window, and the Entry Window callsign field
- In an example of extended sharing, in the Function Key Editor, Comment lines are identified by using the callsign Dupe color, Run Message lines are the normal QSO color, and S&P Message lines are the Double Mult color.
- Callsign background colors (dupes, normal Qs, mults, double mults): control background colors in the Check window and the Entry window Band Panel buttons.
- Callsign colors (dupes, normal Qs, mults, double mults): Affect the colors of callsigns in the Bandmap, the Digital Interface Receive window, and the Entry Window callsign field
- Dedicated colors affect only one or a few windows. Examples of Dedicated colors are:
- Frequency and line colors only affect the Bandmap(s)
- Background color, color of normal text, and Color of My Callsign all apply only to the DI Receive and CW Reader windows
- Color of transmit indicator dot in the Entry Window – the color the normally red dot turns to when transmitting
Fonts Tab
The Fonts tab displays the current setting for five program fonts. Clicking on the font description allows you to select the font family and default font size. If the selected font family and size are different than the default program font (read about the default font below), a [Reset] button will appear to the right of the font description. Pressing [Reset] will revert that font to the program’s default value, regardless of the skin you are currently using.
When making large changes to font sizes, some windows may not automatically adjust to the new sizes. It might be necessary to close and re-open the windows for the new size to display properly.
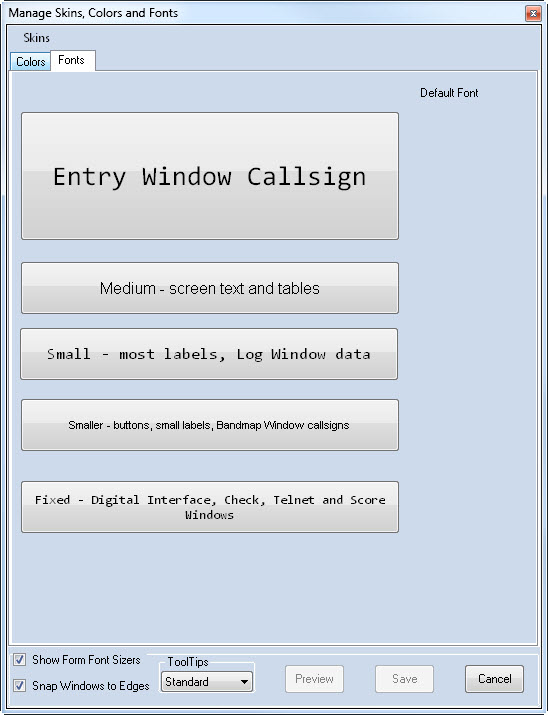
- Entry Window Callsign
Controls the font family and size for the Entry Window fields – callsign, signal report and contest exchange - Medium – Screen Text and Tables
Controls the font family and size of warnings and special messages in the Entry, Info, and Multipliers windows - Small – most labels, Log and Network Status Window data
Controls the font family and size for notes in the lower portion of the Info Window and the grids of the Log and Network Status Windows - Smaller – Buttons, Small Labels, Bandmap Window Callsigns
Controls the font family and size for all program buttons and tabs, notes in the upper portion of the Info Window, summary table in the Available Mults and Qs Window, frequency and callsigns in the Bandmap, text in the Multiplier Window. This font is used in every window of the program. - Fixed – Digital Interface, Telnet and Score Windows
Controls the font family and size for the Check Window, Telnet Window, Digital Interface Receive Window and the Score Summary Window.
Most windows have a “Font Sizer” in the upper right-hand corner. You can use this control to adjust the font of a particular window to be larger or smaller than the default. This control only changes the main font of the window. See Show Form Font Sizers below.
The Skins Menu
Click the link at upper left.
Load Existing Skin
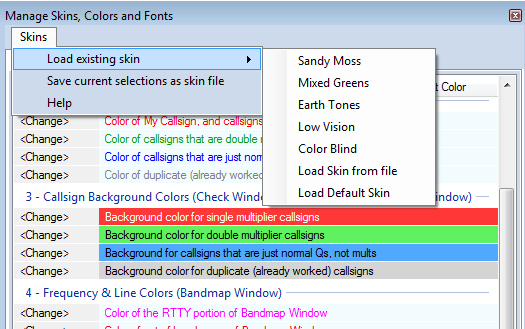
Skins are collections of settings that include the font family, font size, and colors. N1MM Plus includes a variety of built-in skins (see screenshot) from which you can choose. You cannot change these built-in skins, but you can use them as a foundation in creating customized skins.
Load Skin from File
Loads font and color settings from a .SKIN file. The files must be located in the SkinsAndLayouts subdirectory in your N1MM+ user files directory (the one pointed to by the Help > Open Explorer on User Files Directory menu item).
Load Default Skin
Self-explanatory. Gets you back to the default set of colors and fonts.
Save Current Selections as Skin File
After adjusting colors and fonts, you can save the settings in a .SKIN file, which will be stored in the SkinsAndLayouts subdirectory in your N1MM+ user files directory.
From a process perspective, you do not make Skin Changes. You make Font and Color changes. Begin by loading a skin that resembles what you want. Then make changes to Fonts and Colors. When you settle upon a combination that you like, select >Skins >Save current selection as a skin file.
Pressing the >Save button after making changes to Fonts and Colors will preserve the changes you have made, but does not write those changes to a skin file. The original skin file from which you started is unaffected unless you overwrite it with >Save current selection as a skin file.
Other Settings
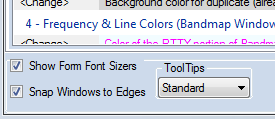
These are found in the lower frame of the dialog, and displayed along with any of the tabs
Show Form Font Sizers
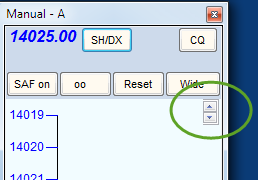
Enabling this setting allows individual font sizes in specific windows, regardless of the default font size setting. When enabled, Font Sizer controls will appear in the upper right-hand corner of the following windows: Telnet, Log, Available Mults & Qs, Multiplier, Digital Interface, Info, Check, Score Summary, and Bandmap.
Snap Windows to Edges
Enabling this setting simplifies the task of aligning program windows adjacent to each other.
Tooltips
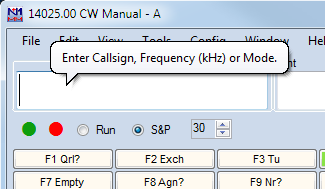
Tooltips display helpful hints that appear when you pause your mouse over certain locations in program windows. The option at the bottom of the Skins, Colors and Fonts window allows you to choose between no tooltips (once you feel comfortable with the program), “standard” tooltips (usually one line of text) and “balloon” tooltips that may be several lines. You’ll find tooltips particularly useful in the Bandmap and Available Mults and Qs windows, where mousing over a call-sign displays the age of the spot, who spotted it, how long ago, and anything that was in the Comment field of the spot.
Changing Font Size and Color in Windows’ Title Bars
From Tom, N1MM – 2017-04-05
N1MM+ users have posted questions and submitted feature requests to change the appearance of the title bars in the application. Unfortunately, that is not something that Microsoft puts under application control. There are two things I found that you can do to improve the appearance of the title bars.
- This is the important one. Go to Display Settings/Advanced Display Settings/Advanced sizing of text and other items/Title bars and set the text size & bold attribute that you like. The bigger the text, the more legible it will be (especially if bold), but the more space every window on your computer will take up.
- To change the background color of the *inactive* windows, go to https://www.tenforums.com/tutorials/32118-change-color-inactive-title-bar-windows-10-a.html to learn how to do it. You have to edit the registry, and be pretty facile with hex/decimal manipulation to be successful at this one. Not recommended for most users. Again, this affects all the windows on the system. I chose to make my idle title bars the same color as the main window color in the skin that I use. Note that the color order is BGR, *not* RGB.

